

How To Use The Massage Melt
-
 1. Warm Up (Optional)
Describe This Column's Purpose
Begin with warm, dry skin, ideally right after a bath or shower. Warm up by holding it between your palms to soften it for smooth application.
-
 2. Massage In
Describe This Column's Purpose
Use the pointy tip to massage areas of tension, such as neck, shoulders, hands, and legs, for targeted relief and relaxation.
-
 3. Glide + Nourish
Describe This Column's Purpose
Glide it over your skin, allowing it to warm and melt as your skin absorbs the nourishing ingredients.
-
 4. The Final Touch
Describe This Column's Purpose
use the remaining residue on your hands to smooth and hydrate your hair—an effortless way to add a finishing touch of moisture and shine.


Intention Behind The Shape
Pointy Tip
for targeting muscle tension, relieving stiffness, and enhancing blood circu
Easy Glide Curve
for the larger surface area for the general application, be sure to use this area to keep the tip sharp
Easy Hold Shape
Its ball shape ensures an easy and comfortable grip

Pointy Tip
for targeting muscle tension, relieving stiffness, and enhancing blood circu
Easy Glide Curve
for the larger surface area for the general application, be sure to use this area to keep the tip sharp
Easy Hold Shape
Its ball shape ensures an easy and comfortable grip
Enhance Your Massage Experience
Boost circulation, release tension, and promote detoxification with lymphatic massage techniques. Designed to work seamlessly with the massage melt, these targeted movements help you feel refreshed and revitalized.
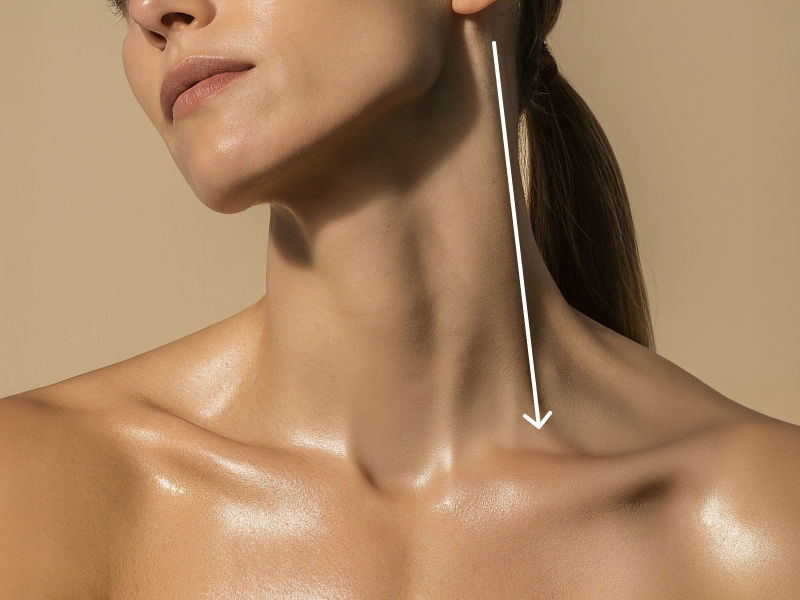
Neck Drainage Pathway
- Place the tip behind your ear at the base of the skull.
- Glide down the side of the neck toward the collarbone using light, sweeping strokes.
- Repeat 5–10 times per side to clear lymph buildup and release tension.
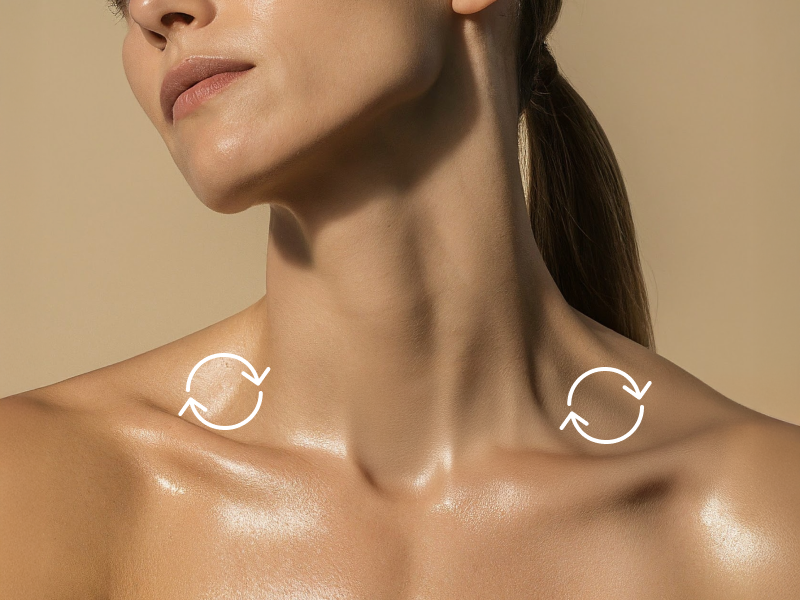
Collarbone Lymph Activation
- Find the soft hollow just above the collarbone.
- Use the tip to apply gentle, circular pressure for 5–10 seconds to stimulate drainage.
- Follow with outward sweeps along the collarbone toward the shoulders.
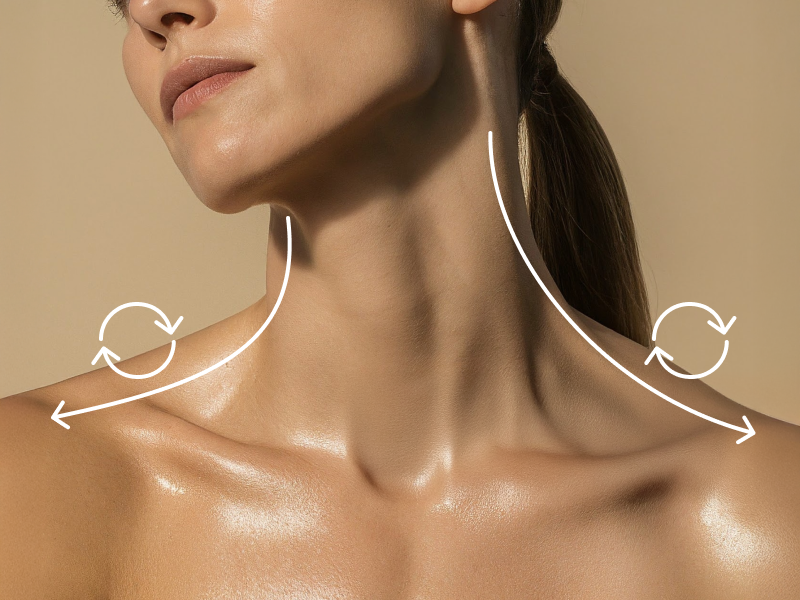
Neck to Shoulder Release
- Start at the side of the neck, just below the ear.
- Glide the massage melt downward along the side of the neck and continue over the shoulder.
- Apply small circular motions on the top of the shoulder muscle to release built-up tension.
- Repeat 5–7 times per side to encourage relaxation and improve circulation.
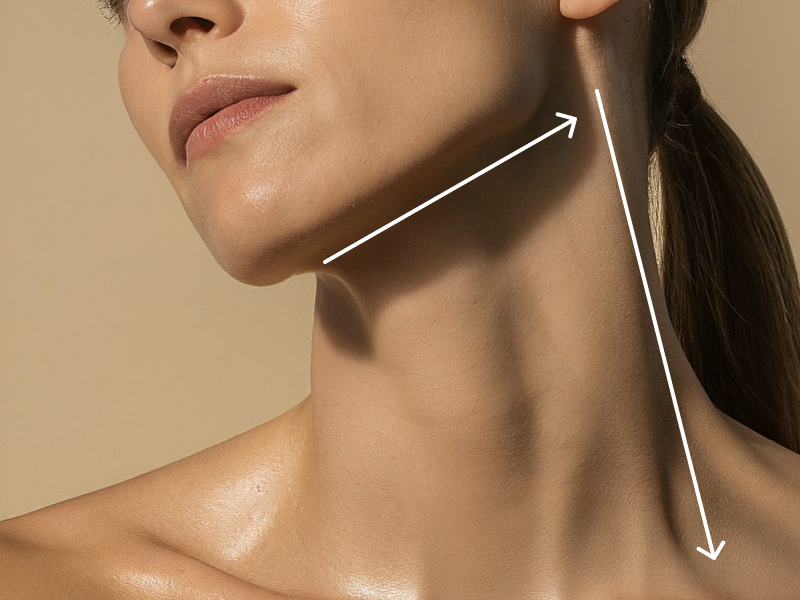
Jawline & Facial Contour Release
- Begin at the center of your chin and glide outward along the jawline toward the ears.
- Once you reach the ears, sweep down the neck toward the collarbone to complete drainage.
- Repeat 5 times to enhance facial sculpting and reduce puffiness.
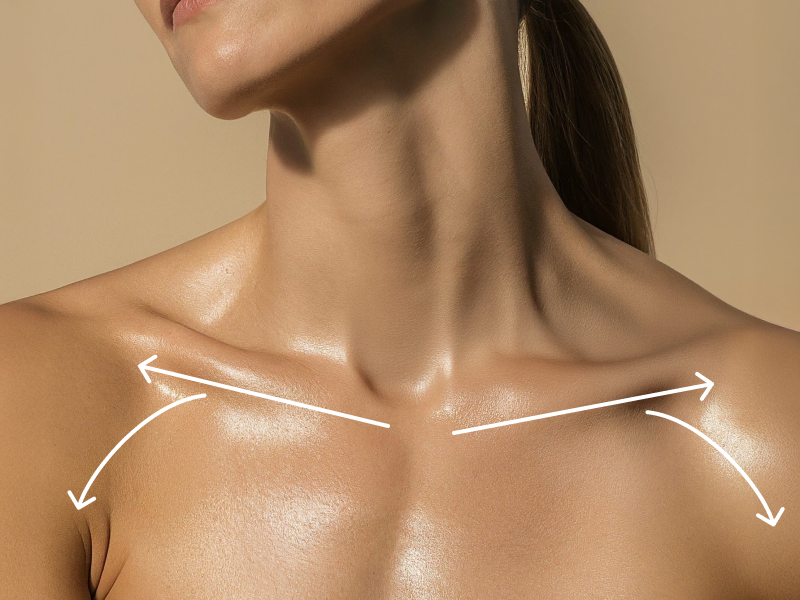
Under-Collarbone to Underarm Drainage
- Locate the area just below the collarbone, near the center of your chest.
- Using light pressure, glide outward along the underside of the collarbone toward the shoulder joint.
- From the shoulder, continue sweeping down toward the underarm, where major lymph nodes are located.
- Repeat 5–10 times per side to stimulate lymphatic flow and help flush out excess fluid.
